Most people don’t think about their garage doors until they break. While Wayne Dalton brand garage springs are known for their remarkable quality, they still need to be replaced from time to time. Before we go over how to replace one of these let’s learn a few things about these springs, with the help of Nabors Garage Doors Alpharetta, which does garage door repair near me.
What Are the Different Kinds of Garage Door Springs?
There is a large range of spring types and sub-types available, with most of them falling under one of two categories. There is the extension spring, which provides counterbalance weight to the door, and the torsion spring that use torque to raise your garage door.
Extension springs are typically located above the horizontal track on both sides of the door. As the name suggests, these springs extend to provide a counterbalancing force to support the door. The more force applied to the door, the more the spring expands.
The torsion spring is attached above the garage opening and slowly twists along a shaft. The more force is applied, either through a motor or by hand, the more the spring turns along the shaft. Torsion springs are typically more expensive but have superior lifting power.
The main line of Wayne Dalton garage door springs is the Torquemaster system, which is considered an improvement on the torsion spring system. This system incorporates additional springs inside the spring bar along with cable drums that attach to the bottom of the door.
What Should I Know Before I Get Started?
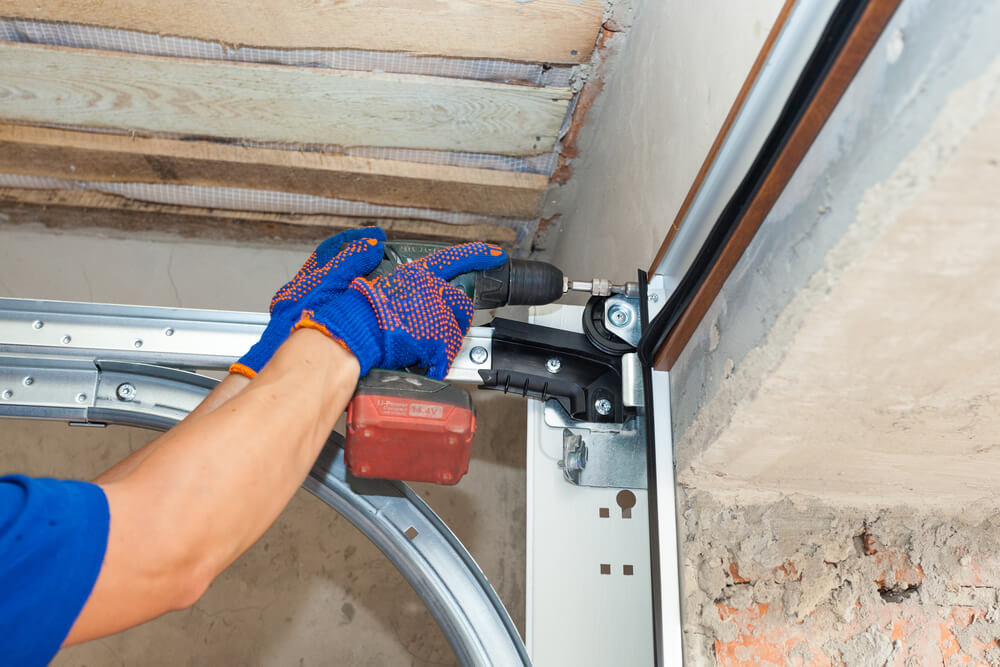
Garage door springs do the brunt of lifting when it comes to moving the garage door, and needless to say they are under a great deal of pressure. Improper installation can lead to this spring snapping, which can cause lacerations, gashes, and even death.
Make sure you have all the proper safety gear on before you even look at your garage door. Protective gloves can help you avoid cuts from jagged metal, and eye protection like glasses or goggles could save an eye.
How Do I Replace My Garage Door Spring?
If we follow the official Wayne Dalton TorqueMaster guide, we will see we need to first remove the spring system. In the single variant, this is done by loosening the lock nut ¼ turn, which should reduce the spring tension of the cable.
If the cable isn’t getting looser, try using an electric drill with a 7/16” hex head to unwind the right hand winding bolt counterclockwise. The number of turns is determined by the height of the door. A 6’0 door is 14 turns, with an additional half turn for every 3”. For example, a 7’3 door would by 16 ½ turns.
Use a flat head screwdriver to pry the counter gear and counter assembly from the right-hand bracket. Then remove the upper and lower lag screws from the same bracket. You will probably need a pair of locking pliers to keep it steady. Remove the bracket carefully.
Before you get to the torque tube, you need to remove the other bracket following the same steps above. Once that is done, lift the torque tube on the right-hand side and slide the cable off of the drum and drape it on the flagangle. Do the same for the left-hand side.
To put on the replacement spring, slide the right-hand spring into the torque tube and then lift the tube assembly into the center bushing of the center bracket. Push the right cable drum over the winding shaft and align its groove with the radial notch on the flagangle. Do the same for the left side.
If things seem to be off, check the level of the tube and adjust it if necessary and then bend the center bracket over the center bushing. Then align the splines of the drive gear over the right-hand winding shaft and press on it until it seated against the flagangle. Do the same for the left-hand side.
To install the counter gear and counterbalance cables, first install that gear with the missing tooth side along the outside, away from the right-hand bracket. Align the “O” number on the cover assembly and press on to it until they lock into place. After this is done, adjust the counterbalance cables by rotating the cable drum.
To place the brackets, use an electric drill (not an impact gun) with a 7/16” hex head to rotate the winding bolts clockwise. Don’t tighten it all the way until you put the left bracket on too. Once attached, rotate the winding bolt 14 turns for a 6’0 door, and an additional half turn for every 3 inches.
If you are unfamiliar with tools and don’t feel comfortable replacing your Wayne Dalton garage spring turn to a professional to help you. To ensure that this spring is kept in good shape and nothing happens to your garage door, get it serviced regularly.